
How to plant clematis against a fence using trellis, wire or plastic netting
Our site is reader supported, this means we may earn a small commission from Amazon and other affiliates when you buy through links on our site.
Clematis are one of my favourite climbers, some of my favourites include the Clematis ‘Multi Blue’ and the Clematis ‘Nelly Moser’ as well as the evergreen (yes that’s right, evergreen!) Clematis armandii. I am also a huge fan of the Montana varieties because of their low maintenance, the minimal pruning that is required and how fast-growing they are. All are excellent for growing up and along a fence to provide a stunning show of colour and create privacy in your garden.
Their big blooms (depending on the variety), ability to twine with other climbing plants usually offer a captivating vertical display for many gardens. You can easily grow them in the ground, or pots depending on your preference but it is worth noting some clematis are better suited to pots, although nearly all clematis will grow well in a large but deep pot.
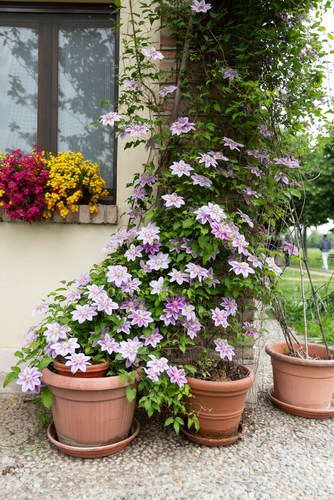
While most clematis will cling to most fences, you do need to fasten some sort of support to the fence before you plant your clematis. Examples of these supports are trellis, horizontal wires or plastic netting as these will give the clematis something to cling to when just starting to send out their new shoots. It also helps you tie in the vines to allow them to cover the area more effectively.
While some gardeners grow clematis just for the ornamental benefits, some varieties do make excellent hedges. My favourite for creating more of a hedge than a screen is clematis Montana. These are ideal as they just need a little pruning after flowering but you can even get away with not pruning them other than to stop them from getting too big.
Having grown plenty of clematis plants in my garden before, I have a few pointers that you may find useful if you are just getting started. You will find tips below on how to grow healthy clematis and how to guide them to their supporting structures. Without wasting much time, let’s dive in:
Providing a structure for clematis to grow up
So the first thing you need to do before planting any clematis is to provide a structure for the clematis to grow up. Providing a structure for clematis is important because they are climbing plants with delicate tendrils, if left to grow wild the clematis will get bushier, heavier and will tangle with other plants nearby.
It also means you can direct the vines where you want them to grow to get the most coverage.
Fixing a trellis, wires or plastic netting to a fence or wall
Trellis
There are several ways you can provide structural support. You can use trellises, of which there are many choices, from traditional wood to steel and even plastic trellis. These are easy to attach by simply screwing the trellis to the wall or to a fence with screws. Don’t forget, if you are fastening the trellis to a brick or stone wall then you will need to use a masonry drill bit and raw plugs.
Steel wires
This is a method often seen in large stately home gardens but it can be an effective method in domestic gardens too. Start by fixing horizontal wires (around 45cm apart) to your fence or wall.
Ideally, you need to space the vine eyes (which you will fasten the wire to) around 6ft apart horizontally, then run wire through them. All you need to do is secure the ends by looping through the eye and wrapping around the thread. You can tighten the wire using a pair of pliers to turn the end of the vine eye.
So what you end up with, is horizontal wires that are 45cm apart, up your fence starting from approximately 45cm above the ground and going towards the top of the fence or wall.
Plastic netting
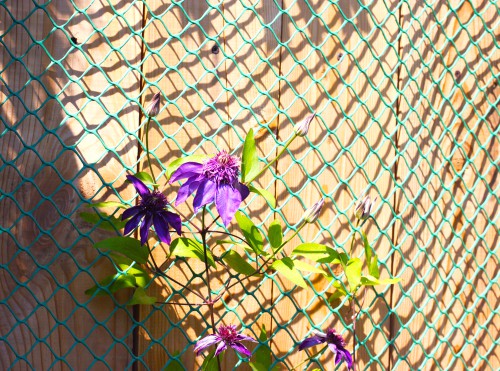
Probably the cheapest method is to get some garden netting and fix it to the fence using heavy-duty staples.
Cultivating healthy clematis
Clematis plants are beautiful as well as delicate and they are not high maintenance. Once you have identified the variety you prefer; whether compact or one of the more vigorous cultivars, plant them in the right soil and they will thrive. Clematis plants prefer well-drained soils with a neutral to alkaline pH.
If you have poor soil or have a patio you can choose to grow the clematis in pots. Ideally, you want a deep pot as clematis like cool roots and to be quite deep-rooted. Adding some pebbles to the top of the pot can also help keep the roots cool and help the soil retain moisture.
Clematis enjoy their time in the sunshine, so ensure you place them in a sunny area, the more sun the better although some clematis will grow in shade.
Read next: My favourite fast growing climbers
Planting the clematis
So I always recommend planting clematis around 45cm from the wall as this allows it to catch the rain. This is helpful because it is usually dry soil right against a fence or wall, this is known as rain shadow. If 45cm is not possible then you can get away with 20-30cm away from the wall. Any closer is not recommended.
The structures have to have adequate room to house the climbing plant as it continues to grow. Follow the tips below to plant and fasten the clematis to the trellis, wires or netting.
Remove the old ties it came with
When you get your clematis, remove all the ties that are already attached to the plant, as well as the cane that it is attached to with a pair of scissors and separate all the vines. A decent clematis should have at least 2 or 3 stems to work with.
Position the canes that with help the clematis reach the trellis
You need to position the canes by inserting them firmly in the soil. The sticks have to be stable; therefore, dig a bit deeper into the soil. These support sticks should be positioned at an angle to allow the plants to reach the fence, trellis or netting easily.
Planting
Now dig a hole at least a few inches deeper than the pot the clematis is already growing in, and twice as wide. It is worth noting that you should plant the clematis a few inches deeper than it was originally so that you bury some of the stems. This helps to prevent clematis wilt. Dig some good quality compost into the soil and backfill the soil around the plant’s rootball.
You can learn more about clematis problems to look out for here.
Attach the stems to the canes
Now it’s planted, attach the delicate vines to the canes using twine or thread ensuring to leave some wiggle room in between. You want to guide the vines towards the support structure to prevent the plant from wandering in different directions.
You will need to continually attach the vines every 10-12 inches using some plant clips or twine. This is especially important for young plants whose climbing skills are not honed yet. Once the plant matures, it climbs easier and neatly fills up the space provided.
Mulching is another essential process in helping the soil retain moisture. While mulching, keep clear of the plant’s crown by several inches. This is just to provide ventilation and avoid setting perfect conditions for fungi or pest attacks.
Care and maintenance for clematis

Once you have successfully guided the clematis into a hedge or ornamental display, there are a few things you can do to ensure the plants stay healthy, even when fully mature.
- Pruning, for one, is essential in maintaining the overall health of the plant and increasing the number of blooms in the coming season. Although clematis doesn’t require pruning to thrive, it helps reign in the plant’s wild growth and stops some varieties getting bare stems lower down. The ideal time to prune clematis is once the flowers fade, regardless of whether the variety you choose blooms in late spring or the autumn. There are actually 3 pruning groups depending on your variety of clematis. You can learn more about this here.
- Replenish mulch around the plants every spring to help the plant retain moisture and control soil temperature on both hot and cold days.
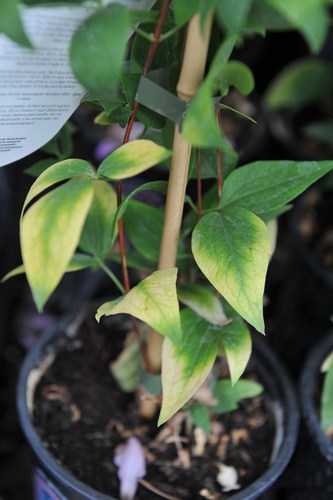
- If you notice the leaves yellowing or the tendrils starting to wilt, establish the root cause immediately. Look out for other symptoms and employ treatment before the whole plant is damaged.
- Together with weekly watering, using a fertiliser when new growth begins will help the plant display healthy blooms and foliage.
Prune your clematis according to their groups, whether it is evergreen or deciduous. Late pruning might reduce the development of blooms the following season.
If you want to learn more about the best clematis for shade, you can read my guide here with some of the best varieties