
When and how to repot an orchid step by step
Our site is reader supported, this means we may earn a small commission from Amazon and other affiliates when you buy through links on our site.
To repot an orchid is a straightforward task if you choose the right pot, the correct growing medium and arrange it all properly. The trick is to know when to repot the plant for successful future growth. This article covers all of this and more, especially for the popular Phalaenopsis orchids, which are my personal favourite.
Signs you need to repot your orchid
Tangled roots
Orchids have naturally tangled roots but tightly mixed up roots indicate a lack of air circulation at the base of your plant. The roots need room to breathe and a larger pot will give them that.
It’s been two years since you last repotted the plant
Orchids need a fresh infusion of potting mix every so often. The best way to do this is to completely remove the old mix and replace it with new. You can buy a commercial orchid potting mix or make up your own. My article Do orchids need special soil informs you of what to put in the potting mix.
The roots are soft and brown
This is bad news. It indicated that the roots have root rot caused by overwatering and not draining out the excess water. It’s harming the health and vitality of your orchid plant. You need to address the root rot problem (See Preventing and treating orchid root rot) and repot the plant.
I early sign of over or underwatering is yellowing leaves.
Choosing the next orchid pot

Selecting a transparent pot to repot your orchid has several advantages. It allows in plenty of light for good root photosynthesis and it lets you see how the orchid’s roots are doing. It also gives you a clear view as to whether your plant is waterlogged, an essential orchid health indicator.
Black or coloured pots are OK but you do have to root around more in them to see how the bottom part of your orchid plant is doing.
Some orchid pots have slits along the sides so water can drain out there as well as at the base. Look also for an inverted cone in the base of the pot for drainage and aeration – two key elements that contribute to orchid root well-being.
As for upsizing your current orchid pot, remember that orchids like growing in fairly tight quarters. Don’t jump to a much larger pot; just go one or two sizes larger. Or stay in the same pot if the plant is healthy.
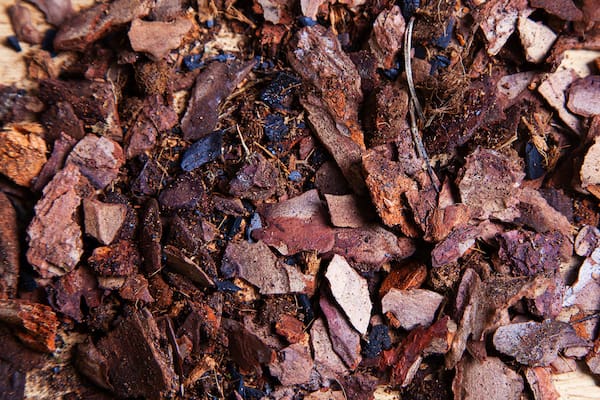
The right orchid potting mix
As mentioned above, orchids don’t grow in regular potting soil. They’re air plants and need a special mix. The mix consists of bark, moss, clay and other organic and inorganic substances. See Do orchids need special soil for information on what to buy or how to make the mix yourself.
How to repot an orchid
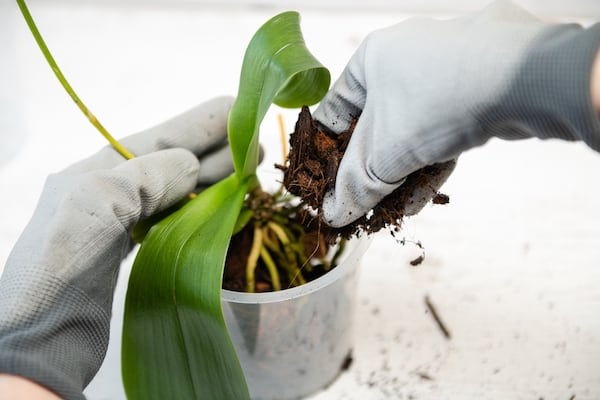
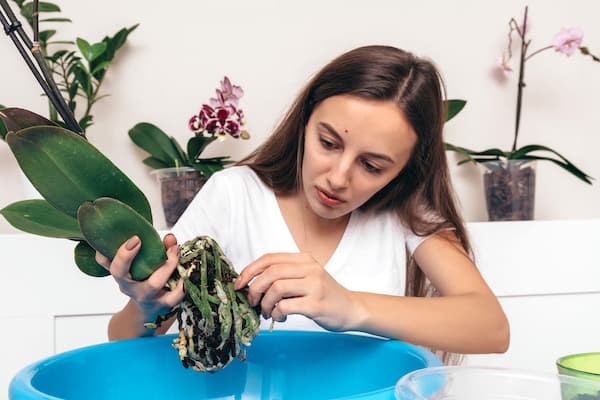
Carefully remove the orchid from its current pot. Lay it flat on a sheet of newspaper.
Inspects the orchid’s roots. Healthy roots are firm and plump, and silvery white or green. Anything that’s brown, hollow, blackened or squishy is diseased. Cut away the dead or diseased roots with a sterilised cutting tool. Don’t touch the good roots with this tool until you’ve sterilised it again.
Sterilise the cutting tool thoroughly and snip the healthy roots back to about 12cm.
If the plant still fits in the old container, completely empty it of the old potting mix. If not, grab the new container.
Hold the plant in the container and fill in the space around the plant with fresh orchid potting mix. Tamp it down gently as you add the mix, particularly around the edges. This should steady the plant in the pot. Fill to within 1cm or 2cm of the top of the pot.
If the plant is still a bit unsteady, use bamboo or other stake to hold it in place until the roots establish themselves in the potting mix.
Thoroughly water the plant until the root ball is entirely moistened. Let the water drain out. (See How and when to water my orchid? for essential reading about this important care task.)
Continue caring for your orchid in its new pot according to the information in How to grow and care for orchids. Add more orchid potting mix if settling occurs.