
Propagating Climbing Hydrangea Cuttings
Our site is reader supported, this means we may earn a small commission from Amazon and other affiliates when you buy through links on our site.
Hydrangeas are a shrub that is resistant to most pests, they can thrive in shade or sun, and they have the strength to bounce back from even the coldest of winters. online retailers will sell container plants, even the smallest of which can be quite expensive. If you don’t want to spend hundreds in order to get hydrangeas throughout your home and yard, you can propagate your climbing Hydrangea cuttings.
Can you propagate climbing hydrangeas?
Yes! Absolutely. In fact, fresh cuttings can help you start a new plant that is identical to the original, and with just a few inches you can grow a mature plant that will fill up any part of your yard.
How to take cuttings from climbing hydrangeas
You take climbing hydrangea cutting the same way as other types of hydrangeas. You start by taking the cutting in the spring when your plant is at its peak growth rate. Avoid cutting in the middle of the afternoon, aim for the morning or the evening when the stem is less vulnerable to heat stress.
If at all possible take your cutting from a branch that isn’t in the process of forming a bud. If you don’t have a branch that fits into that description, don’t worry. You can take a cutting from blooming and non-blooming stems alike it’s just that most gardeners won’t sacrifice a potential Bloom if they can help it.


- Take the sharpest set of shears you have.
- Sanitize them with an alcohol wipe or dip them in a container filled with 9 parts water to 1 part bleach allowing it to sit for 10 minutes. You want to remove any fungal disease that could introduce mildew to your new plant. Even if your shears are brand new, it’s always best to sanitize before you start. In the UK Jayes Fluid is commonly used for this.
- Select a tender, green stem. Stems that are already grey and woody have a less active metabolism so they will take twice as long to take root. Once you have a green stem, make the cut roughly 2 inches below the leaf node which is the point on your stem where the leaves sprout.
- Cut a stem between 3 and 5 inches long. If you want to make multiple cuttings you can use the same branch and cut 2 or 3 cuttings of the appropriate length. Just make sure you don’t cut so low as to encounter that woody part of the stem.
- Remove leaves as they could invite fungal disease to the new cutting. Using your pruners be careful to avoid damaging your stem while removing excess leaves. If the stem is damaged at any point during the removal of the leaves, discard that cutting and try again. Remove all but the highest, top two leaves from the tip of the stem as your plant continues growing. Your stem is not designed to deliver adequate moisture to leaves throughout the stem during the propagating process so you want to make sure that you divert attention to root and stem growth. Rest assured that within another month or so more leaves will be produced.
Once your stem begins the process of propagating it will be forced to develop a secondary root system which is called an adventitious root system. This is any root system that comes from a stem or a leaf.
Planting Your Cuttings
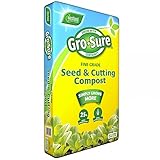
With your stem handy, you want to fill a planting tray with a mixture of potting soil or loam, and make sure that it contains an adequate amount of perlite, the white material in store-bought soil that adds buoyancy to the mixture. You can also use seed and cutting compost instead of potting soil or loam.


Take the end of a pen and poke a straight hole down into the mixture.
To expedite growth it’s recommended that you take the end of your cuttings and dip them into rooting powder which you can purchase from any garden centre or online at Amazon. That rooting powder it’s inexpensive but if you can’t find it there are liquid versions of rooting aids that all do the same thing.

Keeping the top two leaves facing up and being careful not to scrape off whatever powder or hormone you have added to the bottom, carefully stick the end of the cutting into the hole made by the pen. If you have more than one cutting you can plant them in the same tray and you can also plant them close together so that they don’t necessarily touch but they can share the hormones to get disseminated into the soil.

You need to place some sort of covering on your tray. If you have a large enough tray with enough depth you can plant the cuttings and cover the perimeter of the tray with clear wrap, securing it in place around the perimeter with a rubber band or string. Alternatively, you can slide your tray into clear plastic bags making sure that you have some sort of support structure or frame to keep the plastic from actually touching the cuttings.
Place that tray in an area where you get low light and warm temperatures. If you are in a colder region you can invest in grow lights that hang overhead or heating mats that you put underneath the tray to maintain a stable temperature between 70 degrees and 75 degrees Fahrenheit. As your cuttings are propagating you need to lightly mist the soil regularly making sure it doesn’t get dry.
In approximately one month you should start to see your cuttings begin to take root at which point you should transplant the seedlings into individual pots, exposing them to morning sunlight regularly but then bringing them back inside. If your seedlings start to get too long and leggy, you can pinch them off and force them to grow outward in a bushier fashion rather than upward.
When to take cuttings | May – June |
Height reached by propagated cuttings | 60-80 feet |
Where to propagate | Near a fence or wall to support vines |
When the roots take form | After approximately 10 days |
When to transplant | After approximately one month |
How often to water | This is based on your area, wind, exposure, sun, but check every day for the first two weeks |
Water: Maintaining a Safe Balance
Make sure to keep the top inch of your soil dry but don’t over water as this can lead to root rot and since the goal here is to create a secondary root system this is the absolute last thing you want to damage.
Effectively you want your new cuttings to remain moist but never get soggy. With seedling soil and the appropriate amount of perlite, you can increase the drainage in your potting soil. There is no exact formula. It is up to you to check on your plants on a daily basis.
If the cuttings you have a very small, in very small pots and they’re exposed to the elements or they have direct sunlight they might need additional watering to prevent them from drying out but if it’s a darker damper area you might not have to water every day. After approximately 10 days the cutting should start to form new roots at which point you won’t have to monitor it as heavily.
Transplanting: Making a Safe Transition
Once spring has sprung and the weather has warmed it will be time to plant your new climbing hydrangea outside. After approximately 1 month you can move your new hydrangea to its permanent location, against whatever fence or wall you want it to climb.
If you have propagated more than one hydrangea, make sure you plant them approximately 4 to 6 feet apart. Soon enough you will have beautiful blooms dotting your landscape.
Last update on 2025-06-02 / Affiliate links / Images from Amazon Product Advertising API
2 thoughts on “Propagating Climbing Hydrangea Cuttings”
Hello,
If I take a cutting in midsummer, is it advisable to wait until the following spring to transplant?
Thanks!
Hi, if you have each cutting in its own pot then I would say yes, wait until spring.