
Growing Pieris ‘Forest Flame’ General care, planting and propagation
Our site is reader supported, this means we may earn a small commission from Amazon and other affiliates when you buy through links on our site.
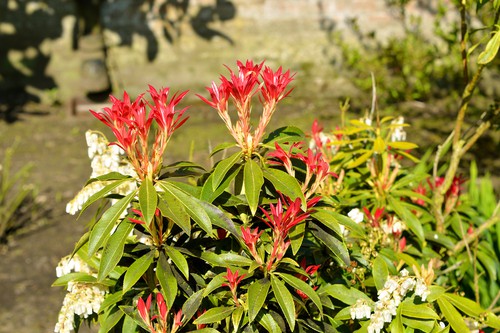
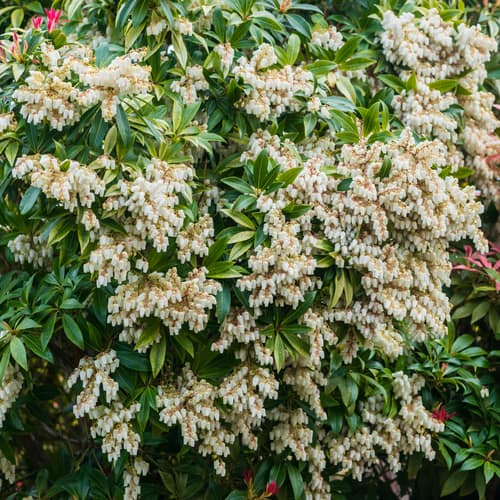
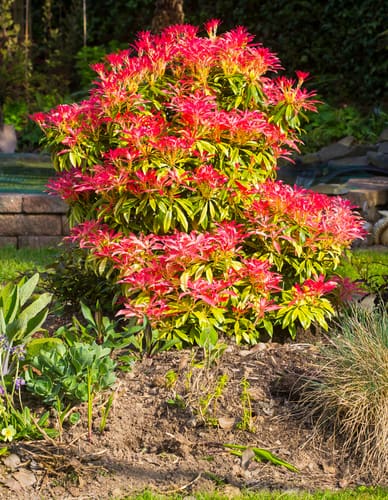
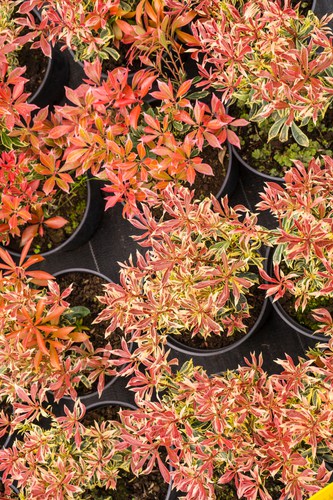
Add a splash of colour to your garden by growing the ever-popular evergreen Pieris shrub. In this guide, I am going to mainly refer to the ‘Forest Flame’ variety, but this information is also suitable for all other Pieris varieties as well. These evergreen plants present dramatic bright red foliage and small clusters of white flowers in the spring for an amazing display.
You can find a wide range of cultivars to grow depending on your aesthetic preferences, so some may flower later in the season and have pinkish coloured flowers rather than creamy white.
This article gives all the information you need to successfully grow pieris. It covers the perfect growing conditions, when to plant pieris, how to take care of them and even propagation.
Without further ado, let us proceed:
Where to grow Pieris to get the most out of them
Known to resemble Lilly of the Valley because of their flowers, the Pieris ‘Forest Flame’ is a compact shrub that is easy to grow. These evergreen plants enjoy a partially shaded site and well-drained acidic soils that are full of nutrients. They will also grow well in sunny positions but are especially happy when in places with dappled shade. This makes them ideal for growing in gardens that are shaded by trees or in a woodland garden.
Another thing to consider when cultivating Pieris is the soil pH because this affects the plant’s nutrient intake. Like blue hydrangeas and rhododendrons, amongst other acid-loving plants, Pieris thrive in acidic soils that drain well. Growing Pieris in waterlogged soils will attract unwanted fungal infections that might kill off the plants.
If your soil is alkaline rather than acidic, you need to add plenty of ericaceous compost to adjust the pH of the soil while providing some much-needed nutrients. Also try well-rotted pine needles as well or instead of this compost. Doing this is not always successful as the soil will eventually revert back to being more alkaline. and then you have to add more ericaceous compost and so on. If your soil has a pH of 4.5 to 5 then this is classed as very acidic, 5.5 to 6 is usually considered acidic whilst 6.5 is slightly acidic.
To test your soil pH level, purchase a soil pH tester – they’re very affordable. If your soil is not acidic, I recommend growing the pieris in pots instead. You can control all the environmental containers in that environment.
Growing Pieris in pots and containers
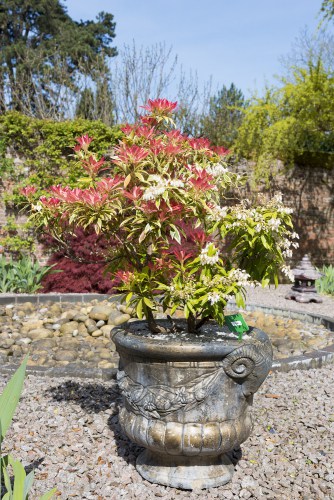
Growing pieris in pots is fairly low maintenance and a great alternative if you don’t have acidic soil. It’s also great if you want plants on your patio or balcony. Check that there are enough drainage holes in the bottom of the pot and make more if you need to. Cover the holes with broken crockery of mid size rocks so that the soil and compost don;t clog them up.
When planting pieris in a container, make sure to use ericaceous compost as a nutrient. this is acidic compost and will keep the environment to the correct pH level. Plants grown in containers also dry out quite quickly, so keep checking the moisture of the soil. And follow the general rules of locating for your potted pieris – a sheltered position out of the wind and in dappled shade is best.
Watering and Feeding Pieris
Newly planted pieris (in the ground or in pots) need watering weekly to get them firmly established. At the start they have a restricted root system that needs to expand outwards and down into the soil. However, once they are established they don’t need regular watering except during very dry spells. But do check your potted pieris frequently as they tend to dry out quickly.
It is just as important to avoid overwatering as that encourages fungal diseases to move into your plant. Check whether watering is necessary by checking the moisture level of the soil. If the soil beneath the surface is still moist there is no need to water daily. If the soil appears dry a few inches beneath the surface, water the plants.
Pieris shrubs need nutrients to grow strong and healthy. After they’re established, give an annual feed of ericaceous compost or well-rotted pine needles. These provide the necessary nutrients to the soil as well as keep the pH level of the soil on the acidic side.
Planting Pieris
You can of course purchase an established plant from your local nursery or garden centre and transplant it into the ground or into a sizeable pot. As you transplant the plant, take care not to damage the roots. Place the root ball into a hole twice its size and hold the plant in position whilst redistributing the soil. Make sure the soil level is slightly below the crown and then compact the soil lightly to remove any air pockets. In general, just make sure you don’t plant it any deeper than it was in the original pot. Add a layer of mulch about 30cm away from the stem of the plant for nutrition. Don’t put it any closer as when the mulch rots, it creates an unfavourable warm and moist environment.
Planting Pieris that have been grown in pots can be done at any time of year, although autumn is best. However, planting in spring or summer as most people do is not be a problem. Just keep an eye on the watering needs of the shrub.
Read next: Growing Photinia ‘red robin’ a good alternative to Pieris, evergreen, bright red spring foliage
Caring for Pieris
Pieris plants are generally hardy and can survive harsh conditions once they are fully established. Growing Pieris Forest Flame is not too hard as long as you provide some general care and maintenance to keep them healthy. Below are a few tips.
- Do not let the soil dry out for young or potted plants. Older shrubs planted in the ground have a deeper root system to get some water, unlike potted plants. Keep your plants well hydrated and even more so when the temperatures are high.
- Apply an ericaceous fertiliser to your plants to provide them with the nutrients they need. You should add acidifying fertiliser around the early spring and late winter to help boost the growth in the flowering season.
- Prune your Pieris only to retain its shape and get rid of dead or diseased branches. Prune your shrub after it’s finished flowering. This gives the plant time to recover before the new season’s growth appears.
- Be on the lookout for pest and disease attacks and mitigate them in time. Pests and diseases can kill or disfigure the plant in a matter of weeks. See below for more information.
- Avoid feeding Pieris immediately after transplanting. This is because the plants will be busy re-establishing the root system and won’t take in many nutrients.
- Mulch the plant using rotted pine leaves or ericaceuous compost to help maintain soil acidity, protect the plant from losing moisture, and act as a temperature regulator.
Learn more about how to prune Pieris in my guide here
Propagating
Pieris ‘Forest Flame’ takes a while to fully mature. Some varieties, especially the taller ones, take up to 20 years. You can propagate these evergreen plants from seeds or alternatively by taking cuttings, which is my personal favourite. I prefer to take cuttings because they take a shorter time to grow compared to starting from seeds.
Taking cuttings
If you want to take Pieris cuttings, you can take softwood cuttings in spring as the new growth appears but after flowering. The cutting should be softwood (basically new growth) and be about 15cm in length. The cutting needs to be typically cut at a 45-degree angle and the bottom leaves removed. After you have done this, the cutting should be dipped into rooting hormone and then planted in moist ericaceous compost that has been mixed with 50% perlite. I like to put 3-4 cuttings into each small pot. Once they have a good root system, re-pot them into larger pots to grow for another season before planting them in their final position.
Make sure to keep the soil moist for the cuttings to establish proper roots. Keep the cuttings away from direct sunlight to prevent wilting from excessive heat.
Growing from seed
Pieris seeds are typically planted in the late spring or summer when there is enough sunlight to support germination. All you have to do is press the seed gently into moist soil, making sure that the seed is not completely covered. Then, place plastic wrap on top of the container and put it in a cold frame until the seeds germinate. Keep misting the soil occasionally to prevent dehydration. This process takes much longer than when you are growing Pieris from a cutting.
Pests and diseases to look out for
Like most plants, the Pieris Forest Flame is susceptible to attacks from various pests and disease infections, though most can be treated. If you notice your plant’s health deteriorating, it’s probably due to one of these issues:
Leaf spot
When this fungal infection begins, it is easy to dismiss it because the brown spots are small. With time, the spots enlarge and eventually cause the leaves to deform and drop. If left unchecked, the fungal infection spreads to the other leaves causing massive defoliation, which weakens the plant.
If you find this infection on your plant, remove the affected leaves and apply a fungicide. Avoid splashing water directly on the leaves as this creates a welcome environment for the fungal spores, further causing the infection.
Pieris lacebug
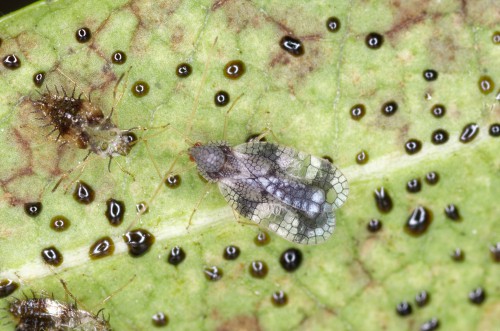
These bugs (as you can tell by their name) are specific to Pieris plants. The small insects affect the leaves by sucking the leaf sap out. This causes mottling on the upper surface of the foliage, which in turn, affects the appearance of the plant. Large infestations of the bugs eventually cause the yellow discoloured leaves to fall.
The small bugs, with wings that look like lace, are easy to control by introducing natural predators such as birds, ground beetles and wasps. You can also treat the leaves with a pesticide if the problem is serious.
Root rot
Root rot in Pieris is brought about by Phytophthora, which is a genus of oomycetes. This infection affects a wide range of plants worldwide and causes irreparable damage. The fungal infection attacks the roots affecting the plant’s ability to absorb nutrients. You might not sense that root rot has infected your plant until it is too late and that is why this disease is fatal.
Once the roots are affected you will start noticing symptoms like wilting, discoloured leaves and branch dieback. The only way to deal with root rot is to avoid it by planting your Pieris in well-drained soils. Destroy any infected plants as the disease can spread to other roots in the vicinity.
Final Thoughts
It is crucial to note that Pieris leaves and nectar are poisonous when ingested; therefore, keep young children and animals away from them. Be careful while handling infected Pieris by wearing gloves and disinfecting cutting tools to avoid spreading diseases. With that being said, I hope you have enjoyed this article and found it informative in how to grow Pieris successfully.